Wednesday, June 19, 2013

The knapsack problem and Budgetting.

I created a prototype for my budgeteer program in my last post, and now I can show you the next stage of the application.

Because the other one was implemented in PHP, html, and javascript it suffered from the fact that PHP scripts are meant to die. While I didn't have any trouble with the script timing out, it seems like a better idea to not have to worry about that at all if I don't have to. Therefore, I moved the application to it's new home in a recent project of mine.

In order to figure out if you can afford your budget there are a few thing's to take into account.

Are your fixed expenses greater than your income?

If your rent cost more than your paychecks for the month combined, you have a problem. Hate to tell you, but you simply can't afford wherever you live. If this is the case, then there's no need to attempt the calculation that would figure out what you're able to purchase from your wish list.

Are your expenses covered?

If you're going out to eat every night with friends and spending twenty dollars each time, unless you have a very nice job and a very affordable living situation, it may be a good idea to stop. In fact, if you can't afford your expenses, it makes no sense for you to even try to determine if you can afford anything on your wish list. It makes more sense to keep your wish list, a wishlist.

Finally, what from your wish list can you afford?

If you've managed to get to the point where all your expenses are covered and you can start eyeing your wishlist for possible treasures, then, and only then is your wishlist going to come into the budget calculation.

How do you do it?

So how do you determine if you can afford all these things? Well, it's a pretty well known problem in computer science called the 0-1 knapsack problem (as long as we're not looking into the date's on the budget, as that will elevate it to a job scheduling problem in addition to the knapsack problem -- which is in the works and might be the subject of my next post) that is actually an NP-complete problem. Or at least, part of it is. Luckily for us, there exist approximation algorithms as well as dynamic programming solutions to the problem.

The problem definition is this: I give you a bag that can hold a certain amount of weight, and a list of items that are heavy and have some value. Your job is to get as much value into the bag as possible without going over the weight limit. If you're curious about the solutions to the problem you can check out the Wikipedia page and read all about them. I found that Mikes Coderama was the most useful source as it was fairly easy to use his code as reference and the Wikipedia pseudo code as a guide as I coded my solution.

Now you might ask, how do you translate my budget into a knapsack problem? We simply define the following mappings:

  • Weight Limit becomes our Total Income
  • Item Value becomes the Price of any expense
  • Item Weight is also the Price of any expense
It's perfectly acceptable to have two properties be the same, if you think about it, it makes perfect sense.  If we wanted to get really fancy, then we could allow a user to order the items in their wish lists or expenses by how much they wanted them and use that as a sort of value multiplier, but to be honest, if you're turning towards budgeting software to help out with your finances, you probably shouldn't have too much of an impact on how valuable you find that extra large big mac over paying your rent. 

Let's talk high level strategy.

Our application breaks up a user's finances into three categories. Checkbook, Bills, and Wishlist. The Checkbook is the only source of Income as well as a source of expenses. Bills are expenses which we absolutely must pay no matter what. The wishlist is self explanatory. 

So first off, we deduct the bills from the income. I thought we were using an algorithm? Don't you worry, we're getting there. But if a user can't afford their bills, then they really shouldn't be spending anything else now should they? Plus, bills tend to be rather high in price, and since our knapsack problem is trying to maximize value of our bag, it's more likely that we'll drop one of our bills in favor of smaller expenses if we have to. And we can't have that since we' need to pay our bills. 

This new quantity of income - bills (let's call the resultant lambda), is our weight limit on our first knapsack problem. First? Yes, first, we're going to solve it twice. Once for our expenses, and once for our wishlist. Why you ask? Because if we can't afford our expenses, then we most certainly are not going to look into purchasing anything from our wish list. Agreed? 

So lambda becomes the weight limit on our knapsack, and we then feed all of the expenses from our checkbook into the algorithm and wait for it to churn out information. Luckily for us, the algorithm will run in O(nW) time with O(W) space where n is the number of items and W is the maximum weight we'll allow in our bag. This is pretty good for an NP problem, and plus, the number of items in our budget will hopefully be rather small considering it's a monthly budget. (And we're assuming we don't go shopping every other day) 

After we've solved the first knapsack problem we can collect the items we included in our bag, and figure out how much money is left over from lambda. Let's call this left over money lambda prime (lambda`) and say it's equal to lambda - (the sum of the values of the items in the previous bag). 

Now, we'll construct our second knapsack problem with lambda` as our weight limit and the items being the wishlist items only if we managed to use all the items in our bag. If so, we'll perform the same calculation again and have plenty of information to send back to the user. 

It works like a charm.

Sunday, June 9, 2013

Budgeteer Prototype

So I've decided to call my little project Budgeteer (Like a muskateer, yet different!) And I've only been working on it the past few days while I sit on the bus back and forth from work, but it's coming along nicely. I have a rather simple front end with no persistence between page refreshes, and a backend that performs a very simple calculation and sends it's response back. But I do like it. I've also just started playing with css3 media queries in order to detect phones. So I've used a little bit of those to make the application appear nicely on my mobile emulator. I'm using Ripple to do my emulation, and so far I'm enjoying it's injection of tiny hippos (I'm not kidding, check out the javascript log when using the extension.) It's really nice.

Anyway,without further adieu here's the results from this week:

What it looks like in a browser

What it looks like on a phone (emulated by Ripple)

The code itself hasn't made it's way to github yet, and is instead sitting on a private repository on my bitbucket account. Also, you may recognize the color scheme from my previous post about javascript caching, that's because this application is using my little library to cache results so it doesn't need to query for the same thing more than once. Of course, when you submit a request to have your budget analyzed, it's not going to prevent you because you've done the action already, but once I implement the sql side of things (which I probably will soon), I plan on having the budget for a session retrieved from the server with the cache using localstorage so it doesn't have to be done more than once. Of course I do need to checkout if local storage is preserved between page refreshes or not.

There's still a lot of variables to be done before this small application is done and doing something really cool, but for not it's just a neat little application with room for improvement. I plan on adding some more budget buddy-esk features in (dates and whatnot) and then plan on having the tool use that type of information to advise you

Thursday, June 6, 2013

Caching with javascript and HTML5 local storage


As I said in my last post, I've started working on another finance tool. While I haven't made much progress on the actual implementation of accounts and all that, I have started creating a core system to speed up the system for efficiency.

I am creating my own Javascript library to cache the results of a request to certain URLs. What happens at the core of this, is thus:

If we haven not yet cached the url we submit our AJAX request to the server, if we have cached the result, we return that instead. Sounds like a pretty simple concept to me. And it turns out, with a little bit of work it's not too hard to implement.

http://pastebin.com/drrqi8Pw

Instead of crudely pasting the code into this post, I've included it in the paste above. while this code will not run if you just plug it into a file (local dependencies on the library I'm making), you can get the general idea of how it works.

A use case can go something like this:
The user calls some function out of the library (such as getBudget) which, after making sure parameters are correctly, sends the url and a requestHandler to the apiRequest function. The url is parsed into just the important parameters and checked against the cache. If it's in the cache that object will be passed as an argument to the users requestHandler, if not, then we'll make the ajax request. Assuming we've made the ajax request, during the respond we'll pass the response JSON to the user's function first, and then we'll perform whatever operations we need in order to store it locally and mark the url we used to get it as cache-able.

You'll notice that I've included the apiSendDate in the paste as well, this is because we need to map CRUD operations (minus the R) to URLs that retrieve that data. This is abstracted away into the apiURLMap object, which (if the finance tool becomes complicated --which it will) will eventually become a function in order to map a single URL to multiple url's that would correspond to stale information.

To prove to you that this works (since I provided non-functioning code above) here's a couple screenshots of my mock prototype --please keep in mind front end is not important to me until the functionality is there--

Network traffic for first submission

S


Submitting a request by clicking the Get Items link


Submitting a second request, uses the cache


Second shot of the network requests, only the first one is there, so we've saved ourselves the trip to the server


Note: Just to let everyone know, localStorage can only store strings by default unless you override the eprototypes, that's why we stringify the data before placing it into the local storage

Sunday, June 2, 2013

Finance applications

For whatever reason, I find myself constantly thinking of making software to assist with budgeting and managing your personal finances. For some reason I feel a strong pull in that direction. Now that I've got a bit of Data Mining under my belt after studying with Xindong Wu I think it's time I applied it. Association analysis is a beautiful thing.

Also, when I first created budget buddy, it was more of an online checkbook. I've started a new project that I plan on making a far more in depth tool. I'm envisioning a php front end with the heavy lifting done by C if necessary  Why C and not something like ruby or java? Well, it might just be my general desire to create from scratch, but I really love the feel of working with C or C++. Hell, I'd love to play with Assembly if possible with this project, but that probably won't happen. Maybe some OCaml though or ML. I could use the Google App Engine and Python to create an application, but for whatever reason I've been digging on Javascript recently, and I don't mean jQuery, I mean pure Javascript, in fact I've made a couple tutorials to keep myself busy and as an exercise in explanations.

As I create the application I plan on posting here a bit with details, and as always the code will probably make it's way up onto github. More to come!


Wednesday, May 29, 2013

Grails. Creating an Inventory Tracking System

So I recently moved, during the move I thought about writing down a list of all the things I had like I had done in prior years, then I realized I could do something a bit better. Why not make a tracking system on my computer? My laptop travels everywhere with me and having my own system running on a local server would work just fine.

For an upcoming job, I need to learn Grails. Groovy on Rails is one of the newer frameworks to come out, so it was a little troublesome to find a good guide to starting. I found the user guide but was instantly turned off by the HUGE amount of knowledge suddenly thrown at me. Being a normal human being, I instantly turned to finding some simple tutorials to help me out.

After watching the 3 screen casts and troubleshooting an error of my own that wasn't covered (modifying the bootstrap file to add a correct instance of a Task), I decided that I had enough information to try to throw together a tutorial of my own (blind leading the blind!).

Without further a due, here we go:

First off I navigated to where I wanted the project to be and ran the grails create-app Inventory command to create my project

Next, I create a Domain class so that I'll have the ability to connect classes together through relationships in the database, as well as it's controller so that I'll have something "nice" to look at when I try to navigate to the controller in my url. Below are screenshots of the sequence of commands, as well as the "nice" thing to look at.  You can see that I restarted my app after making the controller. I did this without CTRL-C'ing the application by creating an empty file called .kill-run-app in the top level of my grails project. This is a shortcut to stopping a server that I found here.
The commands I executed to create the domain class, it's controller and to run the app are here:
create-domain-class Item
run-app
create-controller Item 
run-app (after killing it with the .kill-run-app trick)
What the initial controller looks like (error explained in a moment)
The commands to create domain class and controller
A Quick Side Note: I run my grails command with the argument grails -Dserver.port=9090 because I run an apache2 webserver as well which sits on my 8080 port. Since I don't care to stop my apache2 server whenever I'm working on something slightly different (I do switch between servers when I switch between certain projects), it's just easier to change the port grails runs on with a quick command. When I first installed grails a few weeks ago, I hunted for the default port setting but had no luck finding it.


The funny looking error screen occurs because we have no index.gsp page for the controller we've just created. Yes that is not a typo, grails looks for index.gsp first, then defaults back to looking for index.jsp. We want to make a groovy server page next, not a java server page. But before we do that, let's go ahead and make a second domain class called Type (which surprisingly is not a reserved word in Groovy) that we'll use to be able to sort through the items we're keeping track of.

Now run the following commands in the grails console:
create-domain-class Type
create-controller Type
Creating another domain class and controller

The running app can see it's controllers. Navigating to these will give you the error page from before

Tada! Now let's actually start coding. What we want to do is add some property fields to the two domain class's so they'll actually be useful, and then we'll want to assure ourselves that everything is working nicely. Blogger doesn't have a good source code format so I'll just be throwing in screenshots of my text editor. 
The files we'll modify are:
grails-app/domain/inventory/Item.groovy
grails-app/domain/inventory/Type.groovy
grails-app/controllers/inventory/Item.groovy
grails-app/controllers/inventory/Type.groovy

In the two domain class files, we'll add in the properties and define some constraints on the system. For each Item we'll need a name, a description of what the item is, where the item is and how many of the item we have. The constraints on Item's will be that their name and location can't be blank, that there must be at least 0 of them, and the name of the Item is unique.  Type's are pretty simple, they need a unique non-blank name and that's it. Between the two we define their relationship as Many-To-Many using the static hasMany and static belongsTo properties. It's fairly intuitive to see how groovy expresses that we have many types of a class called Type in that one hasMany statement. In order for the relationship to function, one side of the relation has to belong to another, in this case, the Type belongs to the Item, which means that we add the static belongsTo=Item line into the Type domain class.

Within the controllers we remove the automatically defined index function, and simply add the line:
static scaffold = Type inside the type controller, and static scaffold = Item inside the Item Controller. This sets us up with a CRUD(Create, Read, Update, Delete) view. 

The source code so far

A simple CRUD interface by specifying scaffold to the type, or to true

Simple so far right? The nice thing about using a framework is that SO much get's done for you with a few simple lines.  So at this stage we have our objects and their relationships, and now we just need to display them and provide an interface to the user. 

To do this, we're going to modify the default index.gsp file since it's got some nice styling that we can use right off the bat. First off we'll want to remove the Grails image form the top right. To do that we'll edit the file grails-app/views/layouts/main.gsp 
Changing the layout file

I've hacked it a bit, simply removing the src of the image and forcing the image to be invisible with some (evil) inline css. This is the fastest way to keep the nice green boarder grails provides us with, and do away with their image all at once. If you simply remove the img tag, then the green bar at the top will collapse down to 0 height and that's no good.

Next we edit grails-app/views/index.gsp to be pretty much blank so that we can have at it. I've taken out most of the html content, changed the title tag in the head, and left a snippet of code we'll be modifying to display out items.
Modifying the index page
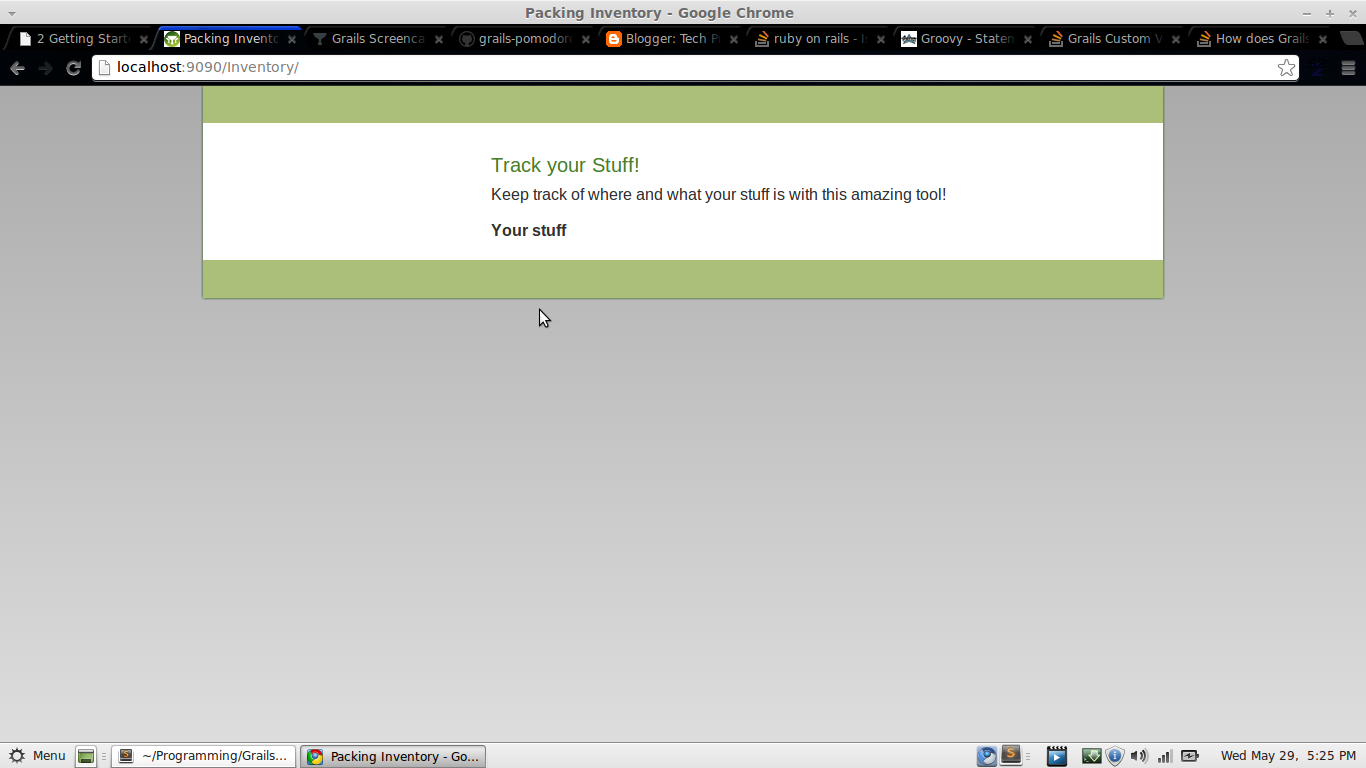
And this is what it all looks like right now:


Unfornately, how to throw interesting data onto your index page is not immediately apparent in Grails since it's using what looks like static information to me. SO, with some help from stackoverflow, we can edit the grails-app/conf/UrlMappings.groovy file to send the index page along to a controller. So we need to make that controller! Running create-controller Index will do the trick just fine. Then we can copy the default index.gsp file to the grails-app/views/index/index.gsp file and then our new Url Mappings will work just fine! 

Create the new controller. Whenever you want a new page, you pretty much make a new controller

Now we need to pull information from both the Types and the Item's controllers. To do that we'll hop into the IndexController located in grails-app/controllers/inventory/ and add some values for us to send along. See the screenshot of the controllers code on the right, and the changes to the index.gsp file to make things appear.
Houston, we have liftoff

And the code doing the work, we haven't used the types yet, but we will!

Next, we want to display each items type next to it, so we'll add in a toString method to the type domain class, and modify the index page to output the type of the item as well.

Add the toString function to type and modify the index file to output it
The result of the toString and output
Next we probably want to give the User the ability to add and edit their own stuff and types. So we can add a couple of links in, I've also modified the list to use table tags instead of list tags since this type of data is better represented in tabular form.
Add links to allow users to edit
The User interface now
And there you have it, a simple inventory tracking system made in grails within a few minutes.


Tuesday, May 21, 2013

Functors, Applicatives, and Monads

http://adit.io/posts/2013-04-17-functors,_applicatives,_and_monads_in_pictures.html


Today I found this really great page through the Computer Science Twitter. IT does a really good job of explaining functors, applicatives, and monads in Haskell. It's a good way to brush up on your functional programming! It's worth a read, and it's done primarily through pictures so if you're a visual learner like I am, you'll have a blast.

Tuesday, April 16, 2013

How to make a patch using git and apply it! C binary file.

As I was walking home from work today I got to thinking about patch files for some reason. Don't ask me, I just did. So I'm walking along, and thinking about how git has patch files as pretty simple things of add this in, take this out. Do that a bunch of times and poof. And I know what it looks like for source code. But then I also entertained the thought about executable files.

So without further a due:

First let's make a directory and hop into it.

Next, let's make our C file

Now compile the program...
Now comes the fun part. Make a new repository and commit it
Now let's make a change to the program
Now recompile the program and check out the status of our repository
We can see that we've modified everything (because we have) and that git is keeping track of our binary for us. So now how do we make a patch? Well, the easiest way to do it is to put these changes on another branch. This will let use some really easy to follow commands. So let's do that.
Next, I'll clear my console with clear and then create the patch. Because I'm alternating between a fullscreen guake terminal, and this blog post I get some weird spacing and the actual patch command to make a bazboz patch file from our current branch is about halfway down the screen.
Now, something you might notice is that since I've been using git add . I've not only added the binary file to the patch, but also the changes to the source code. If I was maintaining some type of non-open source project, or it was a configuration file that wasn't ignored for whatever reason, I would have only added the binary file to the patch. Not a big deal, but just something to take note of. To actually apply the patch file we've made, lets go ahead and switch to master

you might notice I'm already on master, that's just because I switched over in a separate terminal window and was testing the commands I was doing first, that way this little tutorial stays clean.  Once I've switched to the master branch I check to see if the patch is going to fail. Since no warnings or errors pop up from the check option from apply. We can go ahead now.
We could have applied the patch with git apply but if we use git am we sign off on the patch so that everyone who helps us maintain our code can point their fingers at us when something goes horribly wrong and our code is at fault. 

And that's all there is to it! Note that this is a pretty minimal example, and to be honest a patch really isn't necessary at all. If I were just grabbing a commit from another branch I would use git cherry-pick and select the hash of the commit I wanted to grab. But, if you were working on a project like, Drupal or some other large open source and you contributed to core modules and such, they'd probably want to take a patch to make it easy on them to integrate your changes. 

I didn't go into too much detail about anything I was doing I don't think, and if you want a more detailed explanation with a bit more time spent, I recommend This tutorial by Ariejan de Vroom

If you were emailed this patch file, you'd cd to your repository, checkout to your master branch (or whatever branch you want to apply the patch to) and then run the git am commands after dropping the patch file into the directory. Easy!