Wednesday, May 29, 2013

Grails. Creating an Inventory Tracking System

So I recently moved, during the move I thought about writing down a list of all the things I had like I had done in prior years, then I realized I could do something a bit better. Why not make a tracking system on my computer? My laptop travels everywhere with me and having my own system running on a local server would work just fine.

For an upcoming job, I need to learn Grails. Groovy on Rails is one of the newer frameworks to come out, so it was a little troublesome to find a good guide to starting. I found the user guide but was instantly turned off by the HUGE amount of knowledge suddenly thrown at me. Being a normal human being, I instantly turned to finding some simple tutorials to help me out.

After watching the 3 screen casts and troubleshooting an error of my own that wasn't covered (modifying the bootstrap file to add a correct instance of a Task), I decided that I had enough information to try to throw together a tutorial of my own (blind leading the blind!).

Without further a due, here we go:

First off I navigated to where I wanted the project to be and ran the grails create-app Inventory command to create my project

Next, I create a Domain class so that I'll have the ability to connect classes together through relationships in the database, as well as it's controller so that I'll have something "nice" to look at when I try to navigate to the controller in my url. Below are screenshots of the sequence of commands, as well as the "nice" thing to look at.  You can see that I restarted my app after making the controller. I did this without CTRL-C'ing the application by creating an empty file called .kill-run-app in the top level of my grails project. This is a shortcut to stopping a server that I found here.
The commands I executed to create the domain class, it's controller and to run the app are here:
create-domain-class Item
run-app
create-controller Item 
run-app (after killing it with the .kill-run-app trick)
What the initial controller looks like (error explained in a moment)
The commands to create domain class and controller
A Quick Side Note: I run my grails command with the argument grails -Dserver.port=9090 because I run an apache2 webserver as well which sits on my 8080 port. Since I don't care to stop my apache2 server whenever I'm working on something slightly different (I do switch between servers when I switch between certain projects), it's just easier to change the port grails runs on with a quick command. When I first installed grails a few weeks ago, I hunted for the default port setting but had no luck finding it.


The funny looking error screen occurs because we have no index.gsp page for the controller we've just created. Yes that is not a typo, grails looks for index.gsp first, then defaults back to looking for index.jsp. We want to make a groovy server page next, not a java server page. But before we do that, let's go ahead and make a second domain class called Type (which surprisingly is not a reserved word in Groovy) that we'll use to be able to sort through the items we're keeping track of.

Now run the following commands in the grails console:
create-domain-class Type
create-controller Type
Creating another domain class and controller

The running app can see it's controllers. Navigating to these will give you the error page from before

Tada! Now let's actually start coding. What we want to do is add some property fields to the two domain class's so they'll actually be useful, and then we'll want to assure ourselves that everything is working nicely. Blogger doesn't have a good source code format so I'll just be throwing in screenshots of my text editor. 
The files we'll modify are:
grails-app/domain/inventory/Item.groovy
grails-app/domain/inventory/Type.groovy
grails-app/controllers/inventory/Item.groovy
grails-app/controllers/inventory/Type.groovy

In the two domain class files, we'll add in the properties and define some constraints on the system. For each Item we'll need a name, a description of what the item is, where the item is and how many of the item we have. The constraints on Item's will be that their name and location can't be blank, that there must be at least 0 of them, and the name of the Item is unique.  Type's are pretty simple, they need a unique non-blank name and that's it. Between the two we define their relationship as Many-To-Many using the static hasMany and static belongsTo properties. It's fairly intuitive to see how groovy expresses that we have many types of a class called Type in that one hasMany statement. In order for the relationship to function, one side of the relation has to belong to another, in this case, the Type belongs to the Item, which means that we add the static belongsTo=Item line into the Type domain class.

Within the controllers we remove the automatically defined index function, and simply add the line:
static scaffold = Type inside the type controller, and static scaffold = Item inside the Item Controller. This sets us up with a CRUD(Create, Read, Update, Delete) view. 

The source code so far

A simple CRUD interface by specifying scaffold to the type, or to true

Simple so far right? The nice thing about using a framework is that SO much get's done for you with a few simple lines.  So at this stage we have our objects and their relationships, and now we just need to display them and provide an interface to the user. 

To do this, we're going to modify the default index.gsp file since it's got some nice styling that we can use right off the bat. First off we'll want to remove the Grails image form the top right. To do that we'll edit the file grails-app/views/layouts/main.gsp 
Changing the layout file

I've hacked it a bit, simply removing the src of the image and forcing the image to be invisible with some (evil) inline css. This is the fastest way to keep the nice green boarder grails provides us with, and do away with their image all at once. If you simply remove the img tag, then the green bar at the top will collapse down to 0 height and that's no good.

Next we edit grails-app/views/index.gsp to be pretty much blank so that we can have at it. I've taken out most of the html content, changed the title tag in the head, and left a snippet of code we'll be modifying to display out items.
Modifying the index page
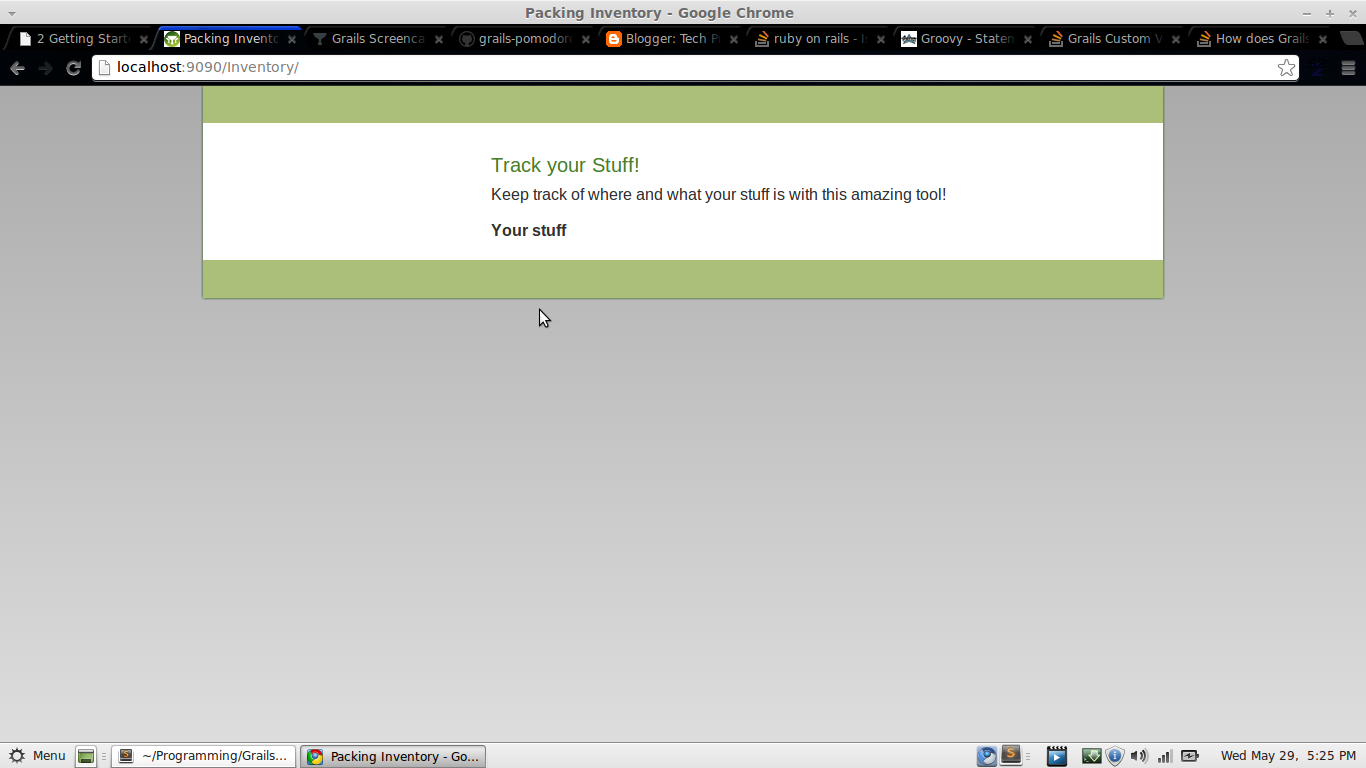
And this is what it all looks like right now:


Unfornately, how to throw interesting data onto your index page is not immediately apparent in Grails since it's using what looks like static information to me. SO, with some help from stackoverflow, we can edit the grails-app/conf/UrlMappings.groovy file to send the index page along to a controller. So we need to make that controller! Running create-controller Index will do the trick just fine. Then we can copy the default index.gsp file to the grails-app/views/index/index.gsp file and then our new Url Mappings will work just fine! 

Create the new controller. Whenever you want a new page, you pretty much make a new controller

Now we need to pull information from both the Types and the Item's controllers. To do that we'll hop into the IndexController located in grails-app/controllers/inventory/ and add some values for us to send along. See the screenshot of the controllers code on the right, and the changes to the index.gsp file to make things appear.
Houston, we have liftoff

And the code doing the work, we haven't used the types yet, but we will!

Next, we want to display each items type next to it, so we'll add in a toString method to the type domain class, and modify the index page to output the type of the item as well.

Add the toString function to type and modify the index file to output it
The result of the toString and output
Next we probably want to give the User the ability to add and edit their own stuff and types. So we can add a couple of links in, I've also modified the list to use table tags instead of list tags since this type of data is better represented in tabular form.
Add links to allow users to edit
The User interface now
And there you have it, a simple inventory tracking system made in grails within a few minutes.


Tuesday, May 21, 2013

Functors, Applicatives, and Monads

http://adit.io/posts/2013-04-17-functors,_applicatives,_and_monads_in_pictures.html


Today I found this really great page through the Computer Science Twitter. IT does a really good job of explaining functors, applicatives, and monads in Haskell. It's a good way to brush up on your functional programming! It's worth a read, and it's done primarily through pictures so if you're a visual learner like I am, you'll have a blast.

Tuesday, April 16, 2013

How to make a patch using git and apply it! C binary file.

As I was walking home from work today I got to thinking about patch files for some reason. Don't ask me, I just did. So I'm walking along, and thinking about how git has patch files as pretty simple things of add this in, take this out. Do that a bunch of times and poof. And I know what it looks like for source code. But then I also entertained the thought about executable files.

So without further a due:

First let's make a directory and hop into it.

Next, let's make our C file

Now compile the program...
Now comes the fun part. Make a new repository and commit it
Now let's make a change to the program
Now recompile the program and check out the status of our repository
We can see that we've modified everything (because we have) and that git is keeping track of our binary for us. So now how do we make a patch? Well, the easiest way to do it is to put these changes on another branch. This will let use some really easy to follow commands. So let's do that.
Next, I'll clear my console with clear and then create the patch. Because I'm alternating between a fullscreen guake terminal, and this blog post I get some weird spacing and the actual patch command to make a bazboz patch file from our current branch is about halfway down the screen.
Now, something you might notice is that since I've been using git add . I've not only added the binary file to the patch, but also the changes to the source code. If I was maintaining some type of non-open source project, or it was a configuration file that wasn't ignored for whatever reason, I would have only added the binary file to the patch. Not a big deal, but just something to take note of. To actually apply the patch file we've made, lets go ahead and switch to master

you might notice I'm already on master, that's just because I switched over in a separate terminal window and was testing the commands I was doing first, that way this little tutorial stays clean.  Once I've switched to the master branch I check to see if the patch is going to fail. Since no warnings or errors pop up from the check option from apply. We can go ahead now.
We could have applied the patch with git apply but if we use git am we sign off on the patch so that everyone who helps us maintain our code can point their fingers at us when something goes horribly wrong and our code is at fault. 

And that's all there is to it! Note that this is a pretty minimal example, and to be honest a patch really isn't necessary at all. If I were just grabbing a commit from another branch I would use git cherry-pick and select the hash of the commit I wanted to grab. But, if you were working on a project like, Drupal or some other large open source and you contributed to core modules and such, they'd probably want to take a patch to make it easy on them to integrate your changes. 

I didn't go into too much detail about anything I was doing I don't think, and if you want a more detailed explanation with a bit more time spent, I recommend This tutorial by Ariejan de Vroom

If you were emailed this patch file, you'd cd to your repository, checkout to your master branch (or whatever branch you want to apply the patch to) and then run the git am commands after dropping the patch file into the directory. Easy!


Wednesday, April 3, 2013

Easy Problem of Satisfiability

Problem:
  Given an expression consisting of AND,OR, and NOT gates, determine whether or not the output of the circuit can be made high. That is, the circuit has I inputs, N gates, and 1 final output.

Solution:
  I have one. This problem was described to me as the natural NP problem. Yet, it is extremely easy to solve in linear time at worst. Which confuses me. An NP problem should take sub-exponential or exponential or worse time to complete. Yet the algorithm I have come up with (I swear it's not in the margin of my notebook, actually takes up just a page) finds not only if the circuit is satisfiable but also implicitly gives back the neccesary input to cause the circuit to output low. Another caveat of my algorithm is that it can be used to find a way to cause a circuit to return low as well. It is very general, and the algorithm itself takes up only 150 lines of code or so. It's a beautiful recursive descent.

I'm meeting with my professor in a half hour to go over it with him. And after this, I will know if I have found a solution to the NP problem of Circuit satisfiability or if I missed the problem definition in some way and merely solved a problem similar, yet easier.

If all goes well, I'll post my algorithm later on today.

Saturday, February 9, 2013

The Smart Desk

https://github.com/EJEHardenberg/SmartDesk

I've started a new project! Working on it with one of my friends who graduated last year, he's working on the Networking component and I'm working on the graphical component. It's a very promising idea in my head, and will get a lot of experience with system programming. I'm looking forward to it.

:)

Sunday, January 20, 2013

EEG and Cairo

Using the outline in this video:
http://www.youtube.com/watch?v=ZmxmeRry2uY

And an arduino board from a friend, I plan to create a small program that will display the output of the eeg onto the screen.

As my recent kick is with C, I think I'll do that. My current plan is to create a couple different programs, one that handle the graphics and another that will handle getting information from the eeg. That way I can develop  one while I assemble the EEG. I think I'll be using Cairo Graphics or OpenGL not sure which yet, I've selected Cairo because it seems like its easy to work with from the examples I've seen. And then I'll have a memory mapped file, or named pipe between the two programs so that they can share data quickly and efficiently.

http://www.linuxquestions.org/questions/programming-9/mmap-tutorial-c-c-511265/

Hopefully this all works out nicely, and if I don't manage to assemble an EEG, then at least I've worked with graphics and memory mapped files. Which I think could become a key staple to learning some parrallel processing techniques.

Thursday, January 17, 2013

Brain Fuck Interpreter. I made one

https://github.com/EJEHardenberg/BF_Interpret

So After a couple of days I've scrapped together my small amount of knowledge of C and created a BrainFuck interpreter.

It was pretty simple since all you're really doing is manipulating a Turing Machine. But creating the interactive bits was fun and a good thought exercise.

There are a few ways to run it once you've compiled it.

Just run it with no arguments:
Gets you the interpreter. Where you can type in all the BF commands you'd like, or comments as long as they don't include 'q' becuase 'q' is the quit key.

arguments of -f filename will read in a file and that file will be fed to the BF translator and outputted according to whatever program you decide.

arguments of anything else: will be taken as BF code and interpreted.

It's a pretty basic program, but it was a good exercise, and I'm going to refactor the code a bit. A friend of mine pointed out that the headers should be just declarations and not full blown source code.